
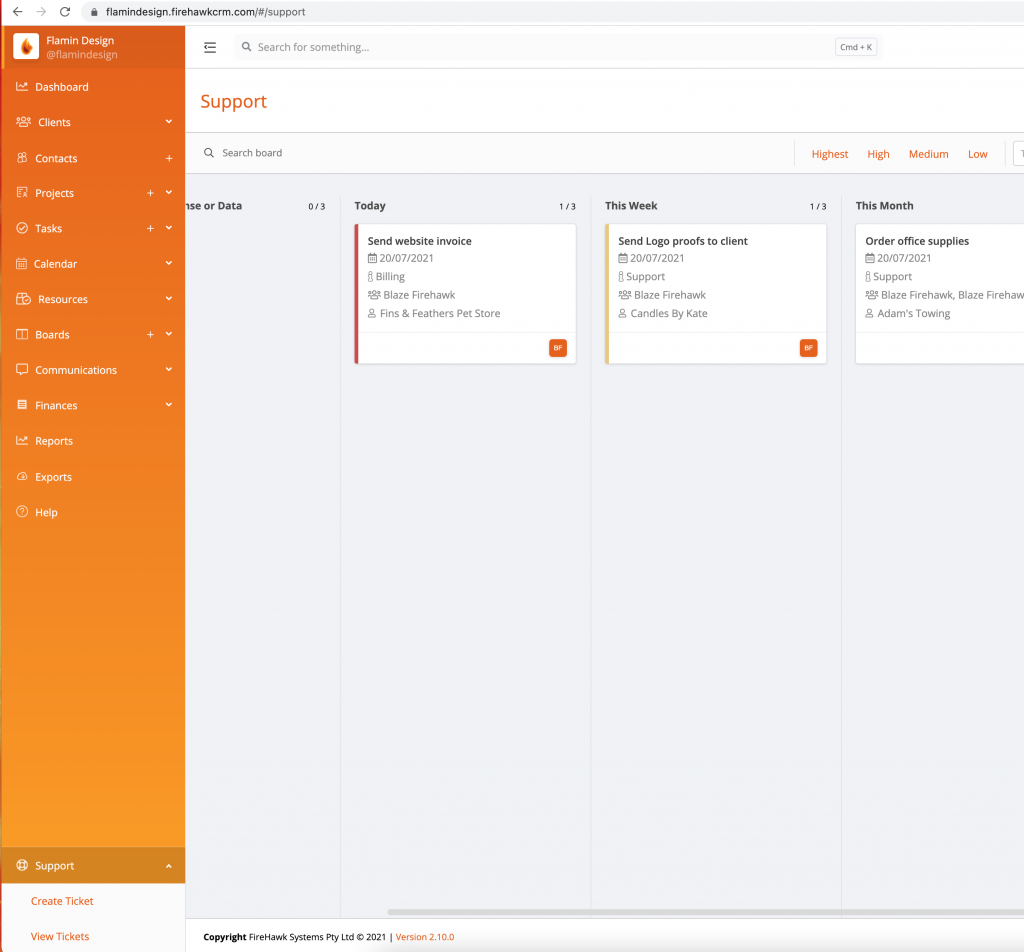
We’re here to help! To create a support ticket for an issue, new feature, addition request and everything in between click the support link in the bottom left hand corner of CRM. Our team work hard to resolve any support ticket submissions as soon as possible and will communicate with you on the ticket you create.
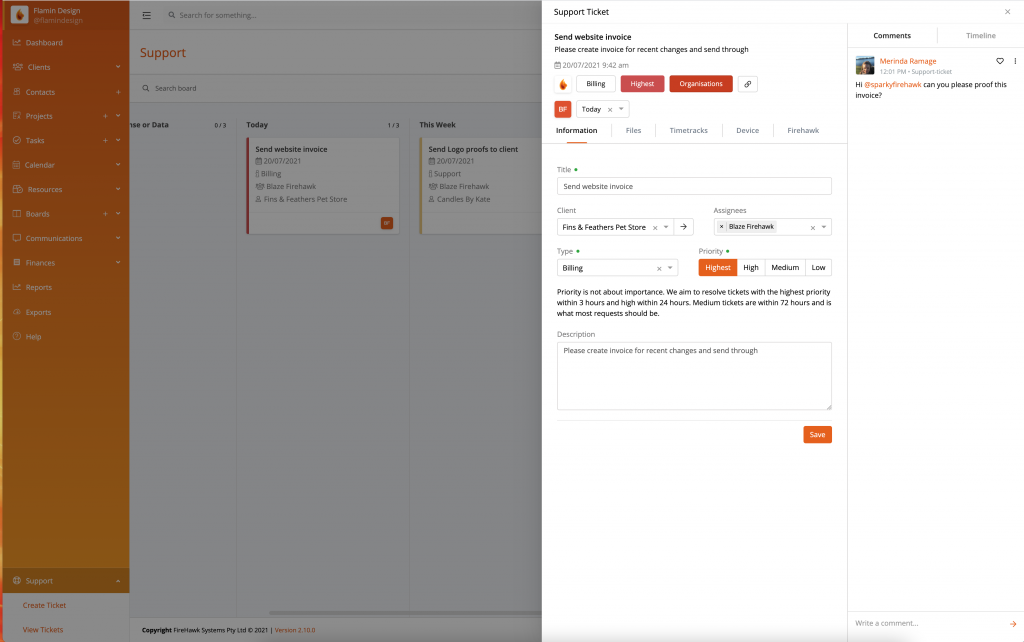
After clicking ‘Support’, select ‘Create Ticket’ from the dropdown. A modal will pop up ready for you to add your details.

Title: A short description of the issue.
Client: Start typing to select the client file relating to the support ticket if applicable.
Assignees: A particular team member can be assigned if known, otherwise the support board is monitored and the team will assign the work out for you.
Type: Using the dropdown select the category for support required.
Priority: This details the importance of the support request and can aid the team in the prioritisation and delegation of work. Please refer to the notes below.
- Highest Severity is for emergencies only as it stops all other development in the FireHawk office. Highest severity means the system is offline or unavailable. 99.5% of tickets created would not fall into this severity level.
- High Severity is for when part of the system isn’t working as expected and it requires urgent attention i.e. for a time sensitive matter.
- Medium Severity is for when something doesn’t work as expected but it only requires attention in the next week or so.
- Low Severity is for bug fixes and new features where the impact on business is low and the fix or feature can be managed within a 4 week period.
Description: Describe the issue/request/addition in detail. Its really helpful if you provide as much detail as you have available in your initial ticket, this will enable the team to complete the ticket as fast as possible. If a Support Ticket is in relation to a particular client or file, please include these details and where possible attach a screenshot.
Attachments: Related documents, images, screenshots can be uploaded for reference at the bottom of the popup. (Multiple files can be added at a later time by clicking on this support ticket from the support board.)
Please create a new support ticket for every individual issue you require help with, that way we can keep all comms relating to the issue in one place and progress the ticket through the stages of development, feedback and completion. Once finished click the ‘submit’ button.

‘View Tickets’ in the bottom left hand corner under ‘Support’. Columns on the board keep you up to date with where the team are up to with your reported issue or request. Want to know more about the Support board – click here.
From the support board you can drag and drop tickets into particular columns to ‘progress’ the work. By clicking on a ticket you can add more information. In the ‘Information’ tab you can see the basic ticket info, and can also update the status of the ticket from the picker next to your profile image. In the ‘files’ tab you can upload multiple files such as screenshots.
The right hand panel of the ticket is for communication with members of the FireHawk team. This is where we will ask questions and provide correspondence. Start typing your comment at the bottom of the comments panel and click the arrow to submit it. To notify a particular team member you can select them by typing @ followed by their name.