Please note: for this guide we are using the “Variation Swatches and Photos” plugin
- Create the parent variable stock item inside FireHawkCRM (this must be selected as Variable and with Custom Variations = “Yes” in the WooCommerce field section)
- Create separate stock items for each of the child items inside of FireHawkCRM
- Visit your WordPress website backend
- Under “Products” in the left hand menu of WordPress click on “Attributes”
- For each possible variation of the stock item create an attribute (i.e. size, colour). For each of these attributes you will need to create the possible options for them (i.e. Red, Green).

6. Once the attributes have been added you will need to go to the left hand menu again and click on “Products”
7. A list of stock items will appear, from here locate and open the variable stock item that has been sent over from FireHawkCRM
8. Scroll down to the “Product data” section of the stock item in WordPress and click on the “Attributes” tab.
9. In the attributes tab you will need to add each possible attribute that this stock item has (i.e. size, colour). When adding them it also asks for the value(s) that are allowed. Please make sure these values are selected and that “Visible on the product page” and “Used for variations” are selected. When you have completed this press “Save attributes”
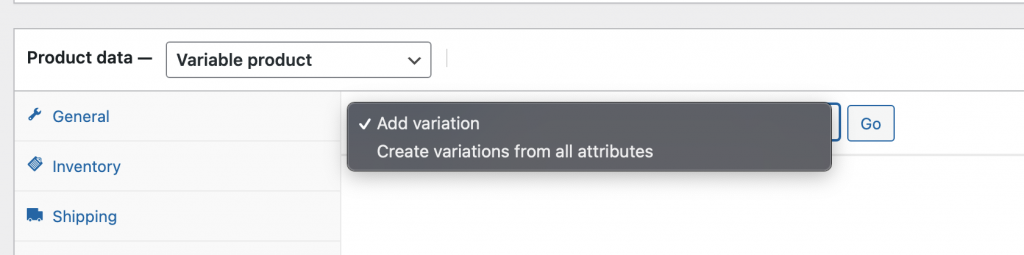
10. Now that the attributes have been added to stock item you will need to click on the “Variations” tab to the left. In this tab you will need to click on “Create variations from all attributes” under the dropdown at the top of the “Variations tab”. After you have click on this please press the “Go” button for it to generate the variations
11. For each variation that is created you will need to set the “SKU”, the “Price” and any other details you require for the customer to see. The SKU is mandatory for each item as this is used to link back to the stock item in FireHawkCRM.
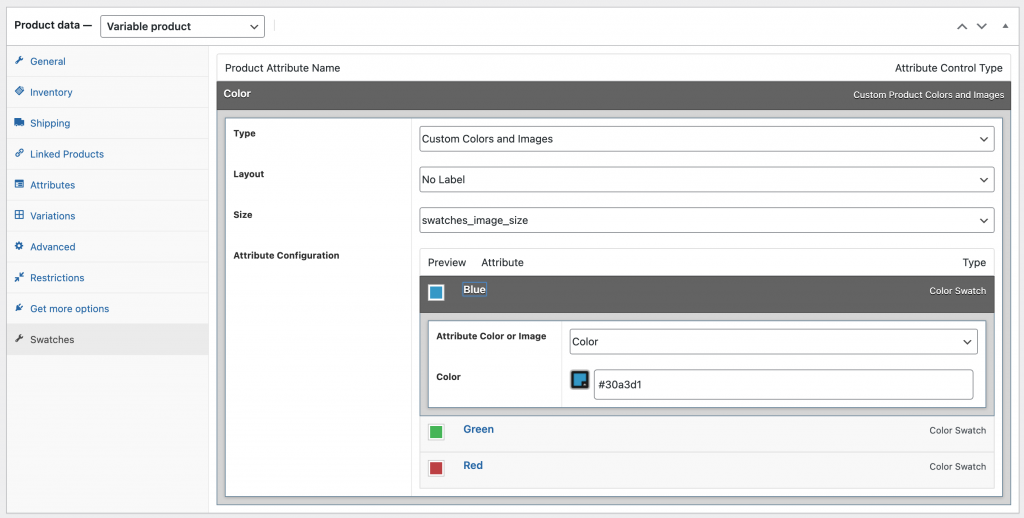
12. After the variations are all setup the actual swatches will also need to be configured. By clicking on the “Swatches” tab to the left. In this section you will need to click on the attribute name and then set the swatch options as needed. You can select to use a colour or an image for each swatch. When you have finished save your changes on the stock item in WordPress and visit it on your store to see the swatch(es).